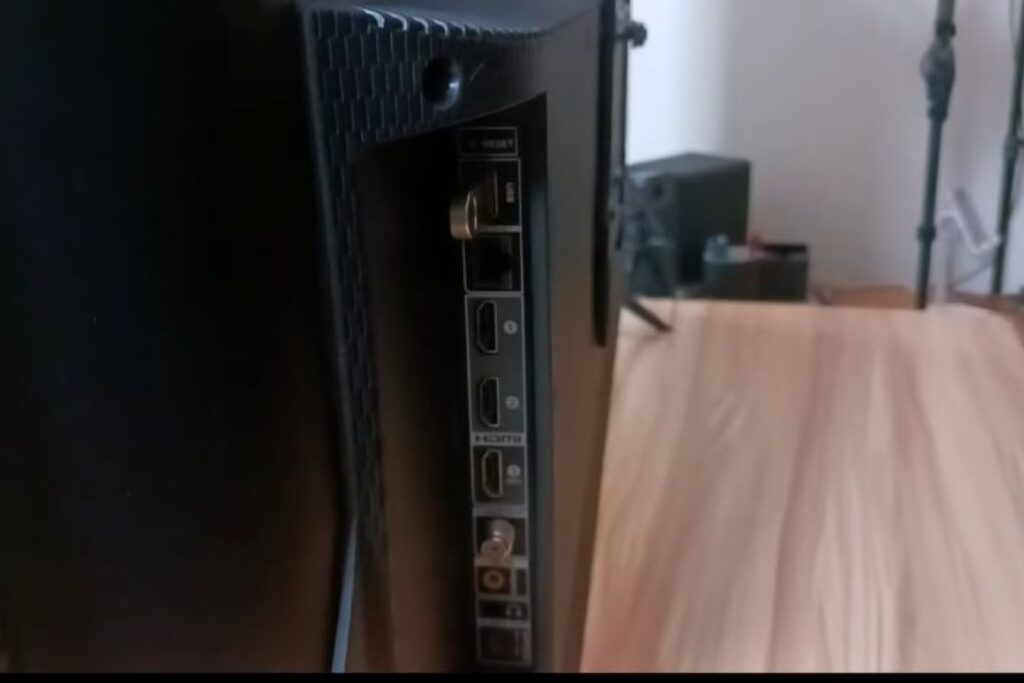
Firstly, transfer your desired media files to the USB device from your computer. Once this is done, locate the USB port on your Roku TV, which can usually be found on the back or side of the unit. Simply connect your USB device to the port and navigate through the Roku interface to access and play your media files.
Using a USB device on your Roku TV allows you to play various types of media files, including videos, music, and photos. This can be a great way to enjoy your personal collection on the big screen with ease. All you need is a compatible USB device and some simple steps to follow.
As you explore the Roku Media Player, you will discover different options for sorting and viewing your content, such as by file type or device. With just a few clicks, your favorite videos, music, and photos will be streamed seamlessly onto your Roku TV for your viewing pleasure.
Related: Adjusting the brightness on your Roku TV for optimal viewing experience, particularly useful in dimly lit environments.
Understanding Your Roku TV’s USB Capabilities
Roku TVs offer a convenient USB port, allowing you to enhance your viewing experience. In this section, we will discuss the supported USB formats and the limitations of Roku TV’s USB port, so you can make the most of this feature.
Supported USB Formats
Your Roku TV is compatible with USB drives formatted in FAT16, FAT32, NTFS, EXT2, EXT3, or HFS+ file systems. These formats are recognized by most devices, ensuring a seamless connection for media playback. Here are some examples of file formats supported by Roku TVs:
- Video: MP4, MKV, MOV, and TS
- Audio: MP3, WMA, WAV, FLAC, and M4A
- Image: JPG, PNG, and GIF
Note that some USB 3.0 drives may not work if plugged directly into the TV, so consider using a USB 2.0 drive or a USB hub.
Limitations of Roku TV USB Port
While the USB port on your Roku TV offers various benefits, it comes with some limitations too. Firstly, it cannot support all video file formats, meaning you might need to convert your files before playing them on your TV.
Additionally, the USB port cannot provide enough power for some external hard drives, requiring a separate power source.
Keep in mind that the primary function of the USB port is for media playback and TV firmware updates. It cannot be used for recording live television or expanding your TV’s storage capacity. As long as you are aware of these limitations, you’ll be able to make the most of your Roku TV’s USB capabilities.
Preparing Your USB Drive for Use
Formatting the USB Drive
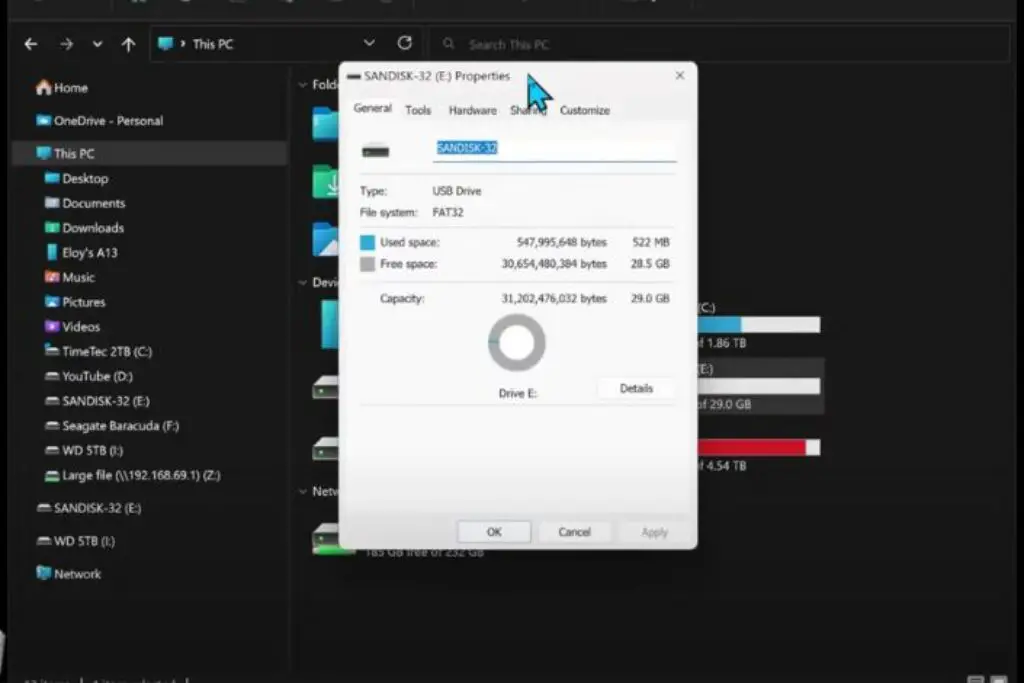
Before using a USB drive with your Roku TV, you may need to format the USB drive to a compatible file system. Most Roku TVs support the FAT32, NTFS, and HFS+ file systems.
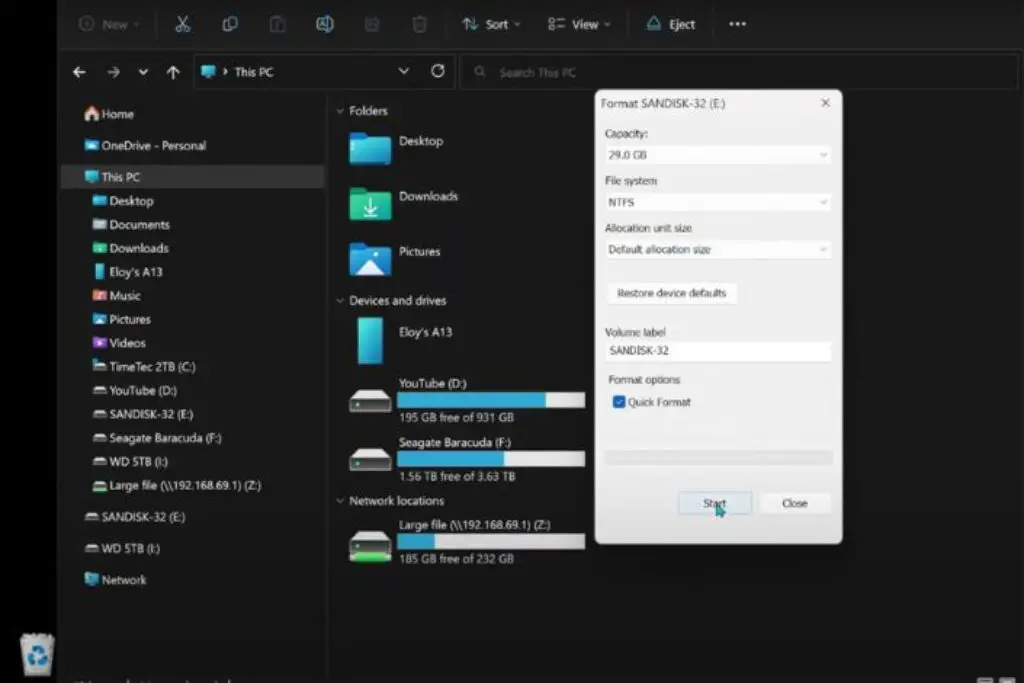
To format your USB drive, plug it into your computer, right-click on the drive, then select “Format” and choose the appropriate file system.
FAT32 is the default file system for external drives, so you must remember one thing while formatting. Before formatting the movement on your PC, select NTFS and type in the file system in the format settings.
Transferring Media to USB
Once your USB drive is formatted, transfer your media files from your computer to the drive. You can use a simple drag-and-drop method to copy files such as photos, videos, and music. After transferring the files, safely eject the USB drive from your computer, and connect it to your Roku TV’s USB port.
Plug in the USB drive to one of the TV’s built-in USB ports. Navigate through the Roku TV interface to access and play your media files. Depending on your Roku TV model, it might also allow you to pause and rewind live TV and access various channels.
Connecting the USB Drive to Your Roku TV
Before connecting the drive to your TV, set some settings on your TV: Home > Settings > System > USB Media > Set to Auto Launch in Prompt.
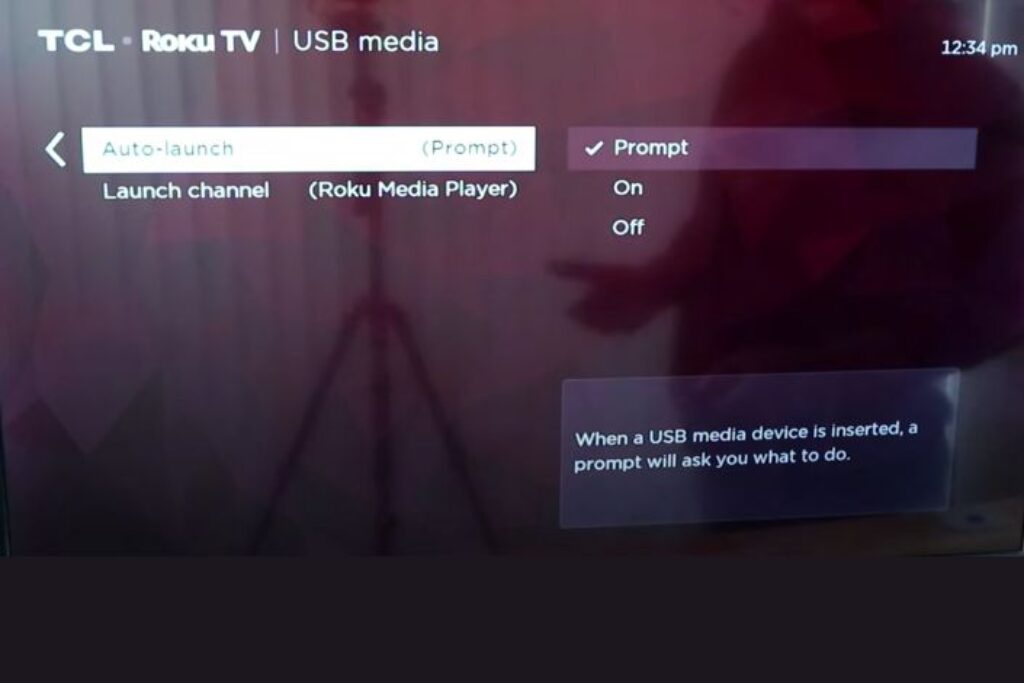
In the second launch channel option, select Roku media player. Setting this will mean that when you insert the USB drive into your TV, you will see a prompt on the TV screen.
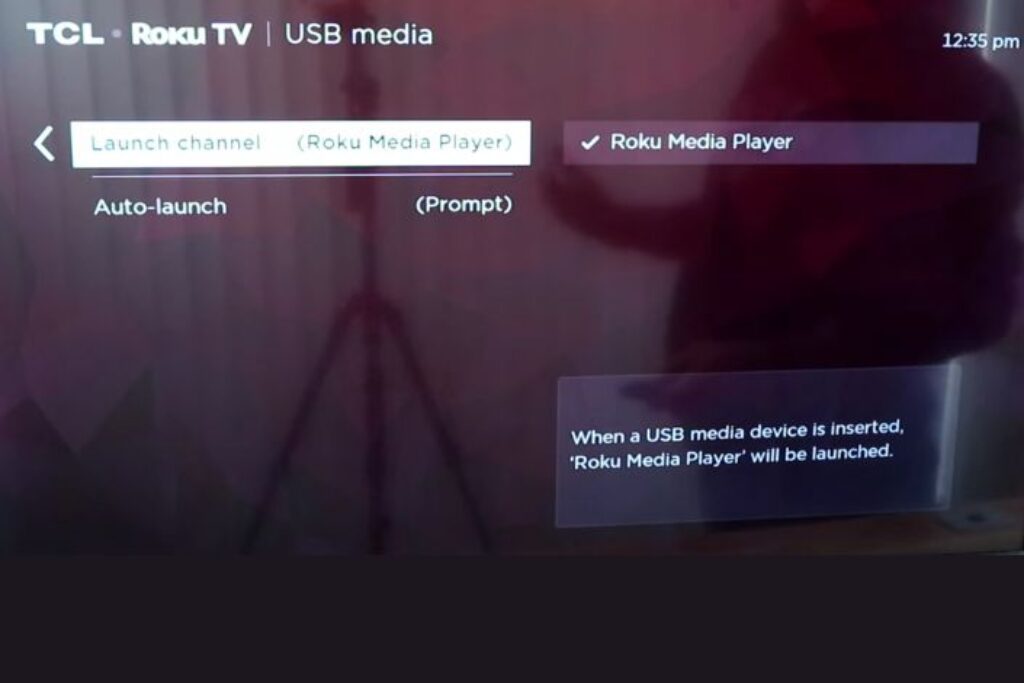
The Launch option in the prompt will launch the USB drive’s contents with Roku Media Player.
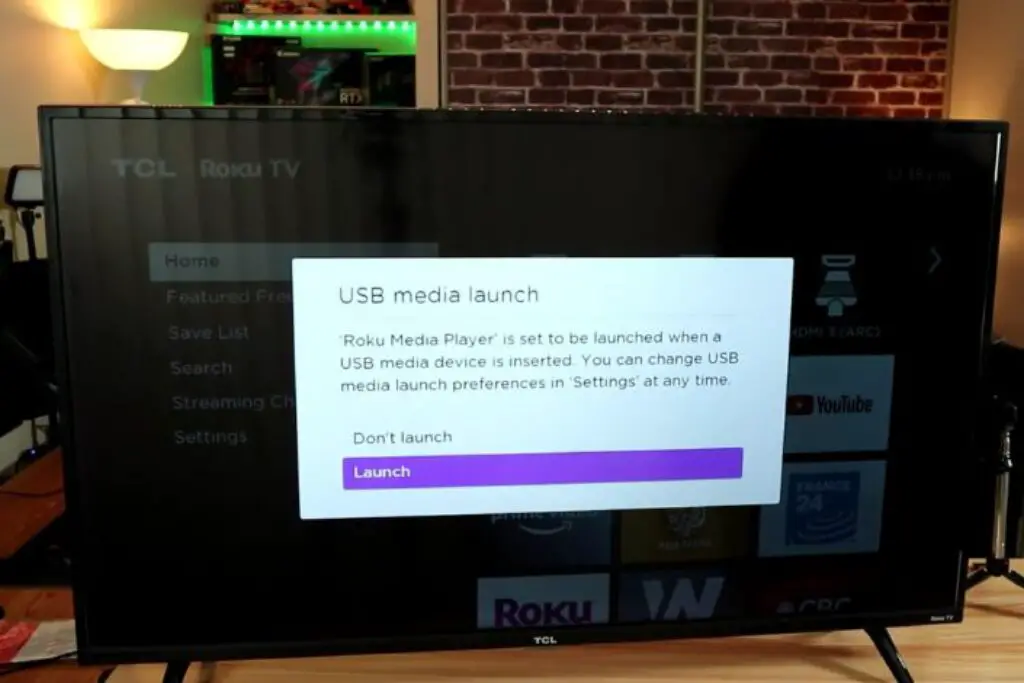
To connect your USB drive to your Roku TV, first locate one of the USB ports on your device. These ports are usually found on the back or side of the TV. Plug your USB drive into an available USB port.
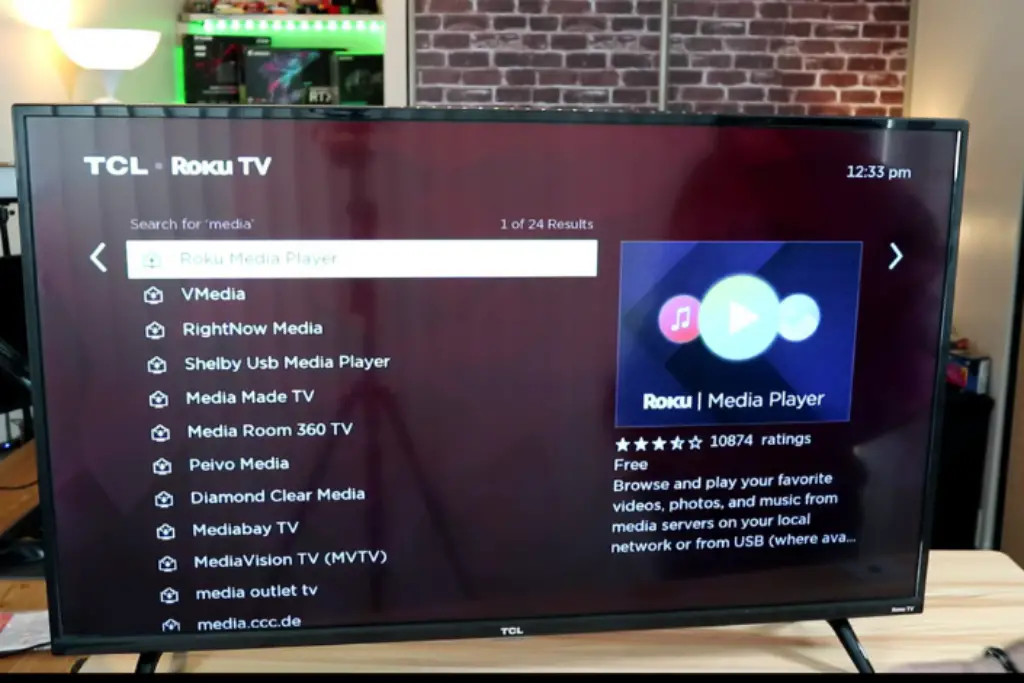
On your Roku TV interface, navigate to the Home screen and select the Roku Media Player app. If the app is not available, download it from the Roku Channel Store. Once the app is open, choose the media type (Video, Audio, or Photo) you want to access from your USB drive.
Your USB drive will appear on the Select Media Device screen. Highlight its icon and press the Star button on your Roku remote. This will display information about your USB drive. Finally, select “Scan” to access your media files and enjoy playing them on your Roku TV.
Navigating the Roku Interface to Access USB Content
Using the Roku Media Player
First, ensure your media files are transferred to a USB device and plug it into the USB port on your Roku TV. Install the Roku Media Player Channel if you haven’t already. Once installed, launch the app and choose the appropriate media type (Video, Audio, or Photo) to access your USB content.
Troubleshooting Recognition Issues
Sometimes, your Roku TV might not recognize the connected USB drive. First, ensure that the USB drive is formatted in the FAT16, FAT32, NTFS, EXT2, EXT3, or HFS+ file systems. If the issue persists, try using a different USB port on your Roku TV, as it might be a port-specific problem.
Also, check if the Roku Media Player is installed on your TV. If it is not, simply add the Roku Media Player channel to proceed. In case the problem still persists, consider testing the USB drive on another device to rule out any hardware issues with the drive itself.
Multi-format Support Queries
s include MKV, MP4, MOV, and WMV. Audio formats such as MP3, WMA, or AAC are also compatible with Roku TVs. For image formats, you can view JPEG, PNG, or GIF files on your Roku TV.
Here’s a quick reference table with common formats:
Media Type
Supported Formats
Video
MKV, MP4, MOV, WMV
Audio
MP3, WMA, AAC
Image
JPEG, PNG, GIF
Remember to connect your USB drive to the available port and open the Roku Media Player for seamless playback. If a particular format is not supported, consider using a third-party media converter to change the file format before attempting to play it on your Roku TV.
Conclusion
In just a few simple steps, you can use your USB on your Roku TV. Begin by locating the USB port on your Roku TV, which is usually on the back or side of the TV. Next, download and install the Roku Media Player Channel through the Channel Store on your Roku TV.
Make sure the video files on your USB device are in supported formats, like MKV, MP4, or MOV. Once your USB device is connected to the TV, launch the Roku Media Player when prompted. You can now navigate through your files and enjoy your media content on your Roku TV.
By following these steps, you can enhance your Roku TV experience by connecting external devices and accessing additional media content. This unlocks the full potential of your Roku TV, making it even more versatile and enjoyable for you to use.


